36 min read
System Version: WEBCON 2026.2.3.145, AI PROXY 2026.2.135.35
Run WEBCON AI Proxy with a fully local LLM using Docker, LiteLLM, Ollama and Qwen3:8b. A step-by-step guide for a secure self-hosted AI setup.
This post provides a complete, step-by-step setup of the self-hosted WEBCON AI Proxy, based on the official AI Proxy Self-hosted | WEBCON documentation and extended with the additional configuration, networking, certificate and troubleshooting steps required to build the environment from scratch.
Running WEBCON AI Proxy with a Local LLM using Docker, LiteLLM, Ollama and Qwen3:8b
WEBCON 2026 R1 introduces the option to run the WEBCON AI Proxy in a self-hosted environment, providing greater control over how and where the AI infrastructure is operated.
WEBCON provides two deployment variants for the AI Proxy: the WEBCON-hosted cloud service and AI Proxy self-hosted. With the self-hosted variant, the AI Proxy runs within the organization’s own infrastructure. It can connect to cloud-based AI services such as Microsoft Foundry (formerly Azure AI Foundry), OpenAI or Google Vertex AI, as well as OpenAI-compatible APIs such as LiteLLM.
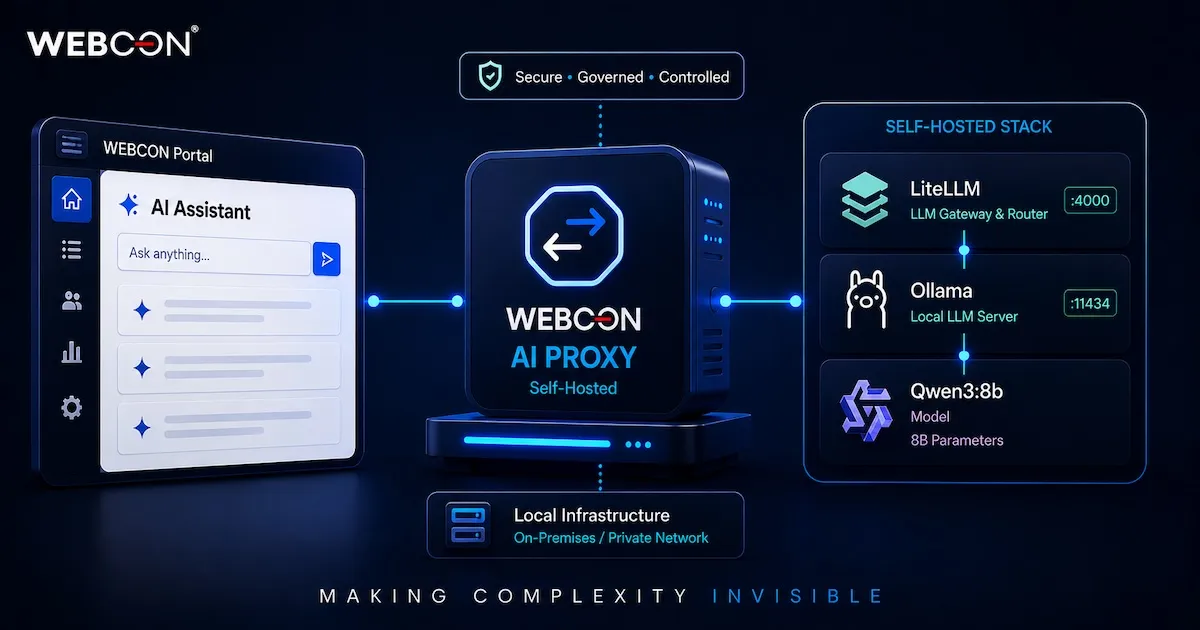
This guide focuses on a fully local approach. The WEBCON AI Proxy, LiteLLM, Ollama and Qwen3:8b are hosted within the organization’s own infrastructure, without requiring an external AI provider.
Running the complete AI stack locally can be an important building block for digital sovereignty and data protection. Prompts, documents and generated content remain within the organization’s own infrastructure instead of being sent to an external AI provider. This provides greater control over data, infrastructure and the choice of AI models, which can be particularly relevant in regulated or privacy-sensitive environments.
The architecture used in this guide is:
1
WEBCON Application Server
2
│
3
│ HTTPS :8081 (exposed)
4
▼
5
Self-hosted WEBCON AI Proxy
6
│
7
│ OpenAI-compatible API
8
▼
9
LiteLLM :4000 (not exposed)
10
│
11
│ Ollama API
12
▼
13
Ollama :11434 (not exposed)
14
│
15
▼
16
Qwen3:8b
Choosing the Docker host
The WEBCON AI Proxy can also be deployed using Docker Desktop on Windows. WEBCON provides an official Docker Desktop example that is particularly useful for evaluation, development and testing.
This guide deliberately uses a dedicated Ubuntu Server VM as the Docker host. For a server-based deployment, Ubuntu provides a lightweight environment with relatively low operating system resource overhead, leaving more CPU and memory available for the AI workloads. It also provides a straightforward Docker and Docker Compose environment without requiring Docker Desktop. Depending on the existing licensing model, using Linux for a dedicated VM may also avoid additional Windows Server licensing costs.
Running the AI stack on a separate host also keeps its resources independent from the WEBCON Application Server. Local LLM inference can consume significant CPU, memory and, when available, GPU resources. Separating these workloads reduces resource contention with WEBCON services and provides clearer boundaries for maintenance, updates, troubleshooting and future scaling.
This is an architectural choice rather than a general requirement. Windows with Docker Desktop, a dedicated Linux VM or another suitable container environment may be the better choice depending on the existing infrastructure, operational requirements, licensing and intended workload. The appropriate architecture should therefore be evaluated individually for each environment.
The AI components run as Docker containers on the same VM and communicate through a dedicated Docker bridge network. Only the HTTPS endpoint of the WEBCON AI Proxy is exposed to the surrounding infrastructure. The AI Proxy acts as the intermediary between WEBCON and the configured AI providers, routing requests to the appropriate provider and model and returning the generated response to WEBCON.
Important:
This guide is based on my own implementation and the knowledge available at the time of writing. It does not claim to be complete or error-free. Feedback, corrections and new findings are very welcome and will be incorporated into future updates whenever possible.
This guide aims to lower the barrier to entry to self-hosted AI by providing detailed step-by-step instructions and additional background for readers with different levels of AI and IT experience.
The resulting environment consists of three containers:
1
Ubuntu VM
2
│
3
└── Docker
4
│
5
└── Docker Compose: webcon-ai-stack
6
│
7
├── webcon-ai-proxy
8
│ └── HTTPS :8081 (exposed)
9
│
10
├── litellm
11
│ └── :4000 (not exposed)
12
│
13
└── ollama
14
├── :11434 (not exposed)
15
└── qwen3:8b
The persistent configuration and data will be stored below:
1
/opt/webcon-ai-stack/
2
├── docker-compose.yml
3
├── .env
4
│
5
├── webcon-ai-proxy/
6
│ ├── aiconfiguration.json
7
│ └── certificates/
8
│ ├── certificate.pem (used by WEBCON AI Proxy and Designer Studio)
9
│ ├── certificate.key
10
│ └── ai-proxy-public-certificate-for-certlm.cer
11
│
12
├── litellm/
13
│ └── config.yaml
14
│
15
└── ollama/
Using /opt keeps the configuration of the complete AI stack in one clearly identifiable location. Strictly speaking, variable application data could also be stored below /var/opt, but keeping the configuration and persistent Docker data together below /opt/webcon-ai-stack makes backup, migration and administration of this self-contained stack straightforward.
Create a new virtual machine in your hypervisor and attach the downloaded Ubuntu Server ISO as the installation media. The creation and configuration of the virtual machine itself depends on the hypervisor being used and is therefore not covered in this guide.
VM resource sizing
The hardware requirements mainly depend on the model being used and the expected workload. The following values are practical starting points for the Qwen3:8b setup described in this guide and should not be considered official WEBCON or Ollama hardware requirements.
The hardware requirements mainly depend on the model being used and the expected workload. The following values are practical starting points for the Qwen3:8b setup described in this guide and should not be considered official WEBCON or Ollama hardware requirements.
Resource
Minimum
Recommended
Performance
vCPU
4
8
16+
RAM
12 GB
16 GB
32 GB+
GPU
Not required
Not required
Dedicated GPU with sufficient VRAM
Disk space
25 GB
40 GB
60 GB+
Qwen3:8b inference
CPU
CPU
GPU accelerated
Text analysis
Suitable for testing
Suitable for regular workloads
Significantly faster
Reasoning
Slow for complex tasks
Usable
Strongly benefits from GPU acceleration
The Recommended configuration of 8 vCPU and 16 GB RAM corresponds to the development environment used for the setup described in this guide.
A dedicated GPU is not required to run Qwen3:8b. CPU-only inference works well for testing and moderate workloads, but response times depend heavily on the underlying physical CPU, available memory bandwidth, prompt and context size, generated output length and concurrent requests.
As a rough indication from the environment used for this guide, a simple text prompt can take approximately 10–30 seconds when running Qwen3:8b CPU-only. More complex prompts, larger inputs and reasoning tasks can take considerably longer. These values are only practical observations and should not be considered benchmarks.
Qwen3 supports both thinking and non-thinking modes. For simple tasks where extensive reasoning is not required, adding /no_think to the prompt can disable the model’s thinking mode and significantly reduce the amount of generated reasoning and therefore the overall response time. For example:
1
Summarize the following text in three sentences. /no_think
For tasks that benefit from deeper reasoning, the default thinking behavior can be retained or explicitly requested using /think.
The Recommended configuration is suitable for development, testing and moderate workloads. For production environments, especially with multiple users, concurrent requests or more demanding AI tasks, the Performance configuration should be considered as the preferred starting point. Actual resource requirements should always be validated against the expected workload and the underlying hardware.
Installation of Ubuntu
The installation is straightforward and does not require any special Ubuntu configuration for this setup. Ubuntu Server does not include a desktop environment by default. If required, a GUI can be installed separately. Instructions can be found in How to Install Desktop (GUI) on Ubuntu Server.
Prepare Ubuntu
First update the Ubuntu installation.
1
sudoaptupdate
2
sudoaptupgrade-y
Verify the operating system:
1
cat/etc/os-release|grepPRETTY_NAME
Expected result:
1
PRETTY_NAME="Ubuntu ..."
Install some basic tools used throughout this guide:
1
sudoaptinstall-yca-certificatescurlopenssljq
Verify OpenSSL:
1
opensslversion
Expected result:
1
OpenSSL 3.x.x ...
Install Docker Engine and Docker Compose
Docker recommends installing Docker Engine through its official APT repository instead of using the Docker packages shipped by the Linux distribution.
Important: Make sure that outbound HTTPS traffic from the Ubuntu VM to download.docker.com is allowed.
Update the package index:
1
sudoaptupdate
Error handling
If apt update returns the following error, Docker may not yet provide a repository for your Ubuntu release. In this setup, Ubuntu 26.04 uses the codename “resolute”:
1
Error: The repository 'https://download.docker.com/linux/ubuntu resolute InRelease' is not signed.
You can then fix this by changing the Ubuntu version codename in the Docker repository configuration. Open the file with nano:
1
sudonano/etc/apt/sources.list.d/docker.sources
In the nano editor, replace the value in the line starting with “Suites:”. Ubuntu 26.04 uses the codename “resolute”. If Docker does not yet provide a repository for this release, use the Ubuntu 24.04 LTS repository with the codename “noble” instead.
1
Types: deb
2
URIs: https://download.docker.com/linux/ubuntu
3
Suites: noble
4
Components: stable
5
Architectures: amd64
6
Signed-By: /etc/apt/keyrings/docker.asc
Press CTRL+O to save the file and CTRL+X to exit nano. Then retry the update and check if the error is gone:
1
sudoaptupdate
Complete installation
Install Docker Engine and the Docker Compose plugin:
1
sudoaptinstall-y\
2
docker-ce\
3
docker-ce-cli\
4
containerd.io\
5
docker-buildx-plugin\
6
docker-compose-plugin
Verify the Docker installation:
1
sudodocker--version
Expected result:
1
Docker version ...
Verify Docker Compose:
1
sudodockercomposeversion
Expected result:
1
Docker Compose version v...
Finally run Docker’s test container:
1
sudodockerrun--rmhello-world
Expected result:
1
Hello from Docker!
2
This message shows that your installation appears to be working correctly.
Useful Docker commands
Show the status of all services in the stack:
1
cd/opt/webcon-ai-stack
2
sudodockercomposeps
Show logs:
1
sudodockercomposelogs--tail100
Follow logs:
1
sudodockercomposelogs-f
Restart the stack:
1
sudodockercomposerestart
Stop the stack:
1
sudodockercomposedown
Start it again:
1
sudodockercomposeup-d
Pull the configured container images and recreate the stack if newer images are available:
1
sudodockercomposepull
2
sudodockercomposeup-d
Important: Be careful when using moving tags such as latest or main-latest in production. docker compose pull may download a newer application version, which will be used when the containers are recreated with docker compose up -d.
Final system updates
You can check if there are any apt updates left by running:
1
aptlist--upgradable
And if there are results you can just upgrade them:
1
sudoaptupgrade-y
Docker Network Configuration
This chapter covers Docker networking modes and subnets.
Docker bridge network vs. host networking
Docker containers can use different networking modes.
With host networking, a container shares the network stack of the Ubuntu host. A service listening on port 4000, for example, is effectively listening directly through the host network stack. Port mappings are not used in this mode.
With a bridge network, Docker creates an isolated virtual network. Containers can communicate with each other without making their ports accessible outside the Docker network.
Docker Compose also provides DNS resolution within the Docker network. Therefore, the containers can address each other using their service names:
1
http://litellm:4000
2
http://ollama:11434
There is no need to assign static container IP addresses.
For this installation, the containers will therefore use a dedicated Docker bridge network.
Make sure the subnet selected for webcon-ai does not overlap with any network found in the host routing table or the existing Docker networks.
If the example subnet overlaps with an existing network, choose another private subnet and use it in the Docker Compose configuration shown later in this guide.
WEBCON AI Proxy supports certificates in PEM or PFX format. When using PEM, the file used by the AI Proxy must contain both the certificate and its private key. For development environments, WEBCON explicitly allows the use of a self-signed certificate.
Important: For production environments, a certificate issued by a trusted internal or public Certificate Authority (CA) should be used instead of a self-signed certificate.
Used by the WEBCON AI Proxy and later in WEBCON Designer Studio AI Settings.
Its contents will later be copied to the WEBCON Application Server.
ai-proxy-public-certificate-for-certlm.cer
Public certificate only.
Its contents will later be copied to the WEBCON Application Server and imported into the Windows Local Computer → Trusted Root Certification Authorities store.
Verify the certificate:
1
opensslx509\
2
-inai-proxy-public-certificate-for-certlm.cer\
3
-noout\
4
-subject\
5
-issuer\
6
-dates
Expected result:
1
subject=CN = webcon-ai-proxy-dev.example.local
2
issuer=CN = webcon-ai-proxy-dev.example.local
3
notBefore=...
4
notAfter=...
Important: Also note the notAfter value. The certificate must be renewed and replaced in both the AI Proxy and WEBCON before this date.
Check the Subject Alternative Name:
1
opensslx509\
2
-inai-proxy-public-certificate-for-certlm.cer\
3
-noout\
4
-extsubjectAltName
Expected result:
1
X509v3 Subject Alternative Name:
2
DNS:webcon-ai-proxy-dev.example.local
Important: The DNS name in the Subject Alternative Name (SAN) must match the hostname used later in the WEBCON AI Proxy network address in Designer Studio.
Verify that the combined PEM file contains the private key and certificate:
1
sudogrep"BEGIN"certificate.pem
Expected result:
1
-----BEGIN PRIVATE KEY-----
2
-----BEGIN CERTIFICATE-----
Important: The certificate configured in WEBCON AI Settings must contain both the RSA private key and the public certificate. Using only the public certificate causes loading the AI model list to fail with No RSA private key found in PEM.
The AI Proxy configuration will therefore use the LiteLLM model name qwen3-8b.
Note about the LiteLLM master_key
Security note: The master_key shown above is only an example. Choose a long, randomly generated secret for your environment and do not reuse the example value. The master_key protects access to LiteLLM and should therefore be treated like any other API credential. The WEBCON AI Proxy can later authenticate against LiteLLM using this master key or a dedicated LiteLLM virtual key.
A random key can, for example, be generated with:
1
opensslrand-hex32
Expected result:
1
9d3c...<64 hexadecimal characters>...a74f
Copy the generated value and use it as the master_key in config.yaml. The same value will also be configured as the API key for the LiteLLM connection in the WEBCON AI Proxy Config Admin UI.
The WEBCON AI Proxy stores its provider and model configuration in aiconfiguration.json. Instead of starting with an empty configuration, we can already provide the basic LiteLLM configuration. This configuration can later be reviewed and modified through the Config Admin UI.
Security note:chmod 666 is convenient for the initial setup but unnecessarily permissive for a permanent installation. After determining the UID/GID under which the AI Proxy container runs, ownership should be assigned accordingly and the permissions tightened.
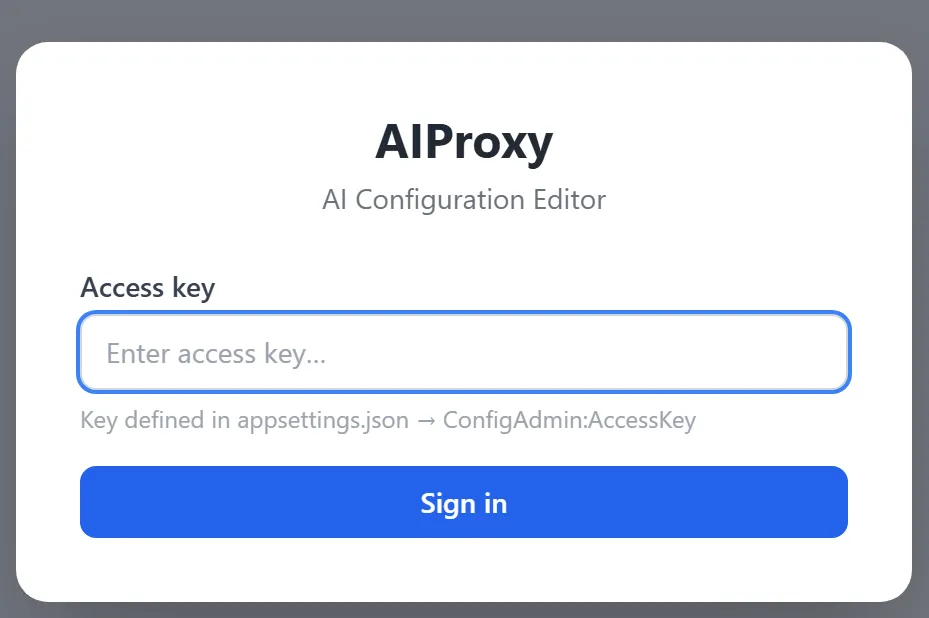
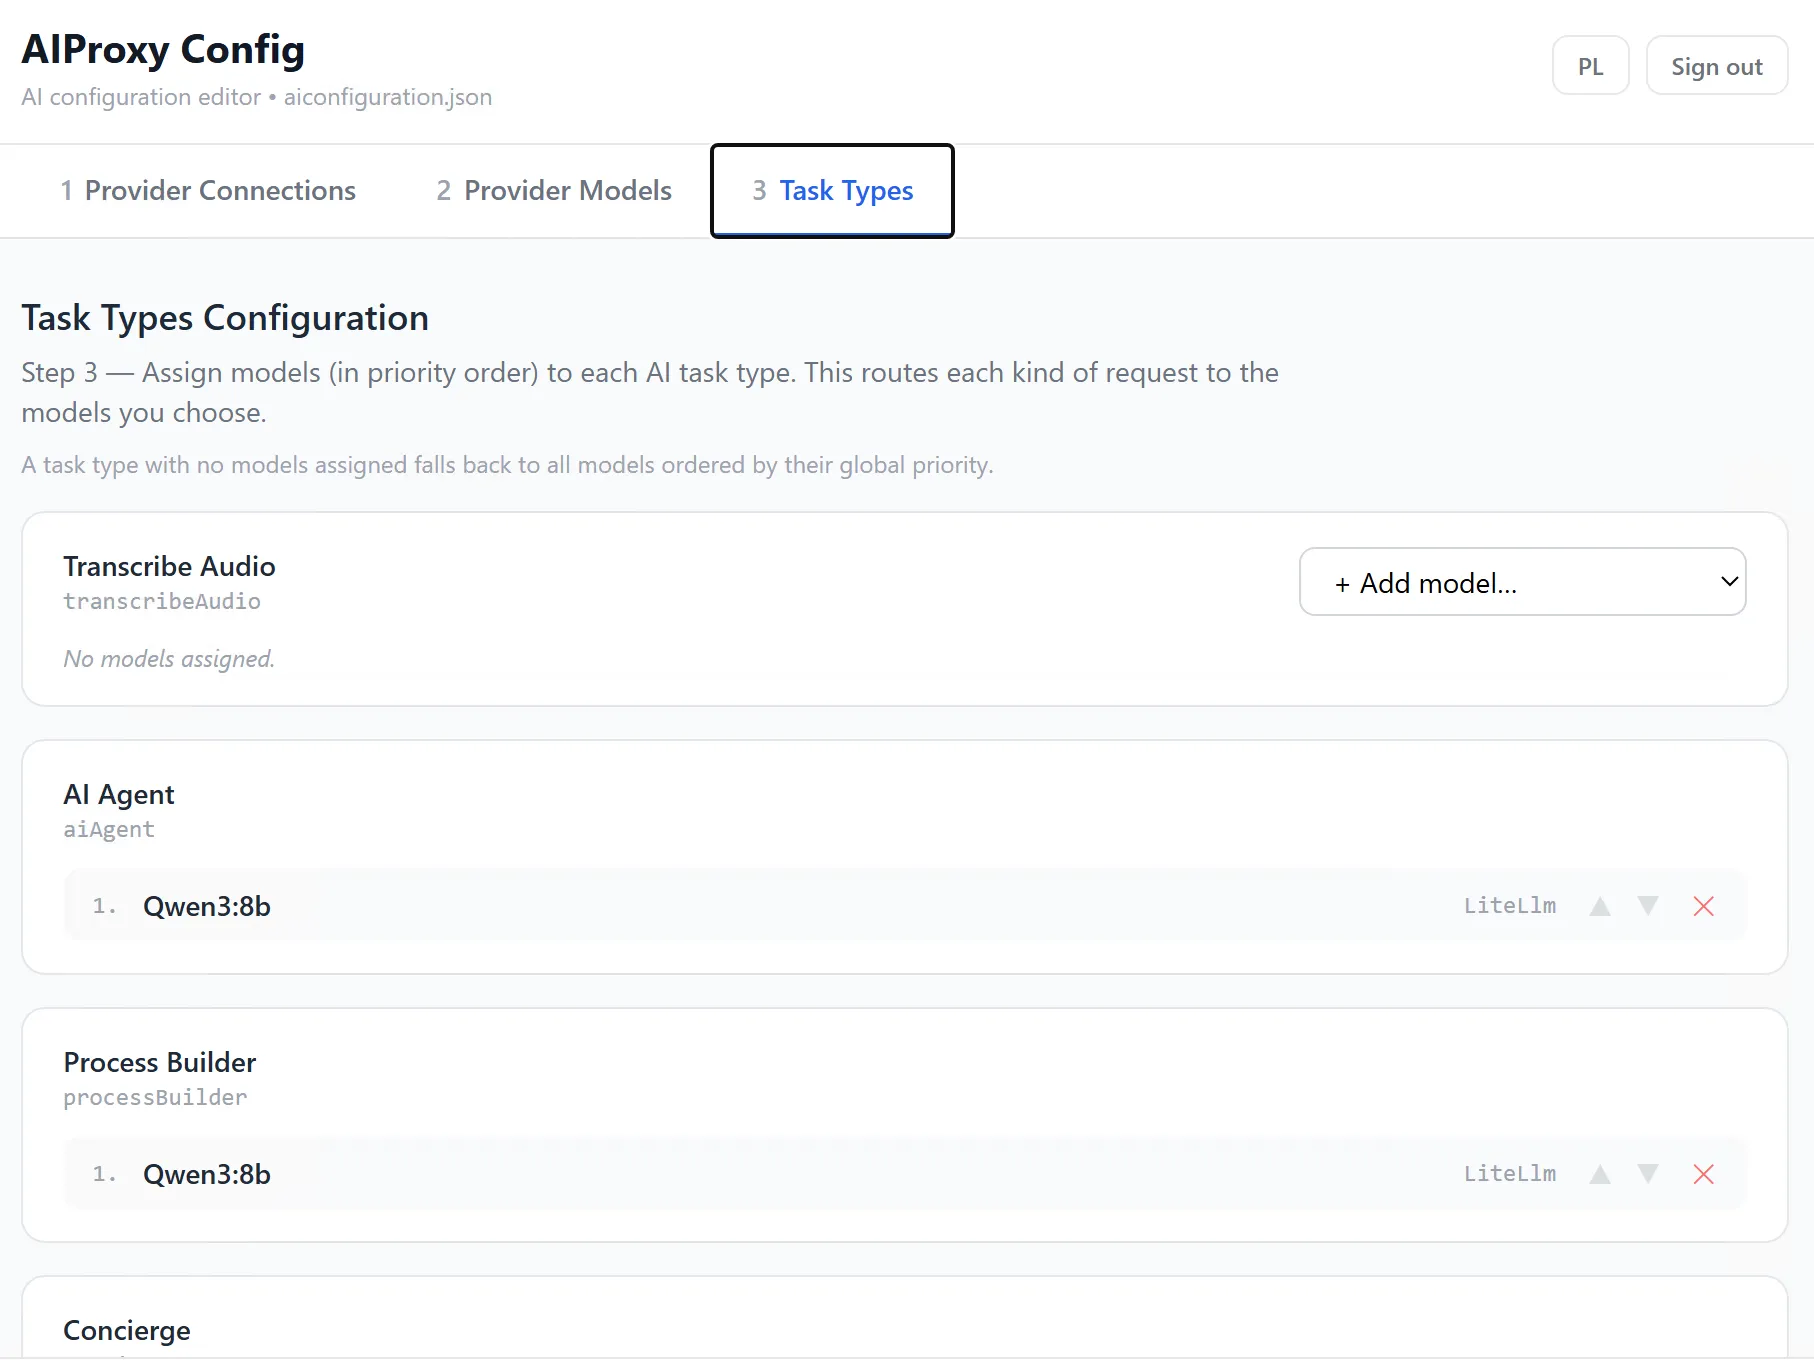
The configuration can later be reviewed and modified through the WEBCON AI Proxy Config Admin UI in the browser:
The example assigns the local Qwen3 model to the text-based AI task types configured in AiTaskTypesConfiguration, while audio transcription, image generation and embedding generation remain unassigned.
At the time of writing this blog post, the WEBCON AI Proxy version is explicitly pinned to 2026.2.135.35, matching the version used in the official WEBCON AI Proxy Getting Started example.
Important:
main-latest and latest, however, are moving tags. A deployment performed later may therefore pull different versions of LiteLLM or Ollama.
For a reproducible production deployment, replace these tags with the exact LiteLLM and Ollama versions that have been tested in your environment.
The aiconfiguration.json file may also contain sensitive provider API credentials. WEBCON explicitly warns that this file should therefore not be committed to source control.
Before starting anything, let Docker validate the complete configuration without printing the resolved configuration with the quiet parameter because of the AIPROXY_CONFIG_ADMIN_ACCESS_KEY:
1
cd/opt/webcon-ai-stack
2
sudodockercomposeconfig--quiet
Expected result:
The command completes without an error. If the YAML is invalid, Docker reports the affected configuration before any containers are created.
Pull the container images
Pull the container images defined in docker-compose.yml:
1
sudodockercomposepull
Verify:
1
sudodockerimages
Expected result should include images for:
1
webconbps/aiproxy
2
ghcr.io/berriai/litellm
3
ollama/ollama
Start Ollama first
Start only Ollama:
1
sudodockercomposeup-dollama
Verify:
1
sudodockercomposepsollama
Expected result:
1
ollama ... Up
Verify that the Ollama API is responding:
1
sudodockerexecollamaollamalist
Expected result:
1
NAME ID SIZE MODIFIED
At this point, the model list may be empty. This confirms that the Ollama API is responding correctly.
Check its logs:
1
sudodockercomposelogs--tail20ollama
The container should start without fatal errors.
Notice that Ollama does not have a ports: section.
Port 11434 therefore exists inside the Docker network but is not published on the Ubuntu host.
Download Qwen3:8b
Pull the model directly inside the Ollama container:
1
sudodockerexecollamaollamapullqwen3:8b
Depending on the network connection, downloading the model may take some time.
Verify:
1
sudodockerexecollamaollamalist
Expected result should contain a column:
1
NAME
2
qwen3:8b
Test the model:
1
sudodockerexecollamaollamarunqwen3:8b"Reply only with: OK"
Expected result should contain the model-generated response OK.
At this point:
1
Ollama
2
│
3
└── qwen3:8b ✓
is working independently of LiteLLM and WEBCON.
Start LiteLLM
Start LiteLLM:
1
sudodockercomposeup-dlitellm
Verify:
1
sudodockercomposepslitellm
Expected result:
1
litellm ... Up
Check the logs:
1
sudodockercomposelogs--tail50litellm
The logs should show that LiteLLM started successfully and is listening on port 4000 inside the Docker network.
Again, there is deliberately no:
1
ports:
2
- "4000:4000"
LiteLLM is reachable from the other containers but not directly from the LAN.
Test LiteLLM from inside the Docker network
Because LiteLLM is intentionally not exposed to the host network, test it from another container attached to the same Docker network.
Replace <your-litellm-master-key> before executing this command:
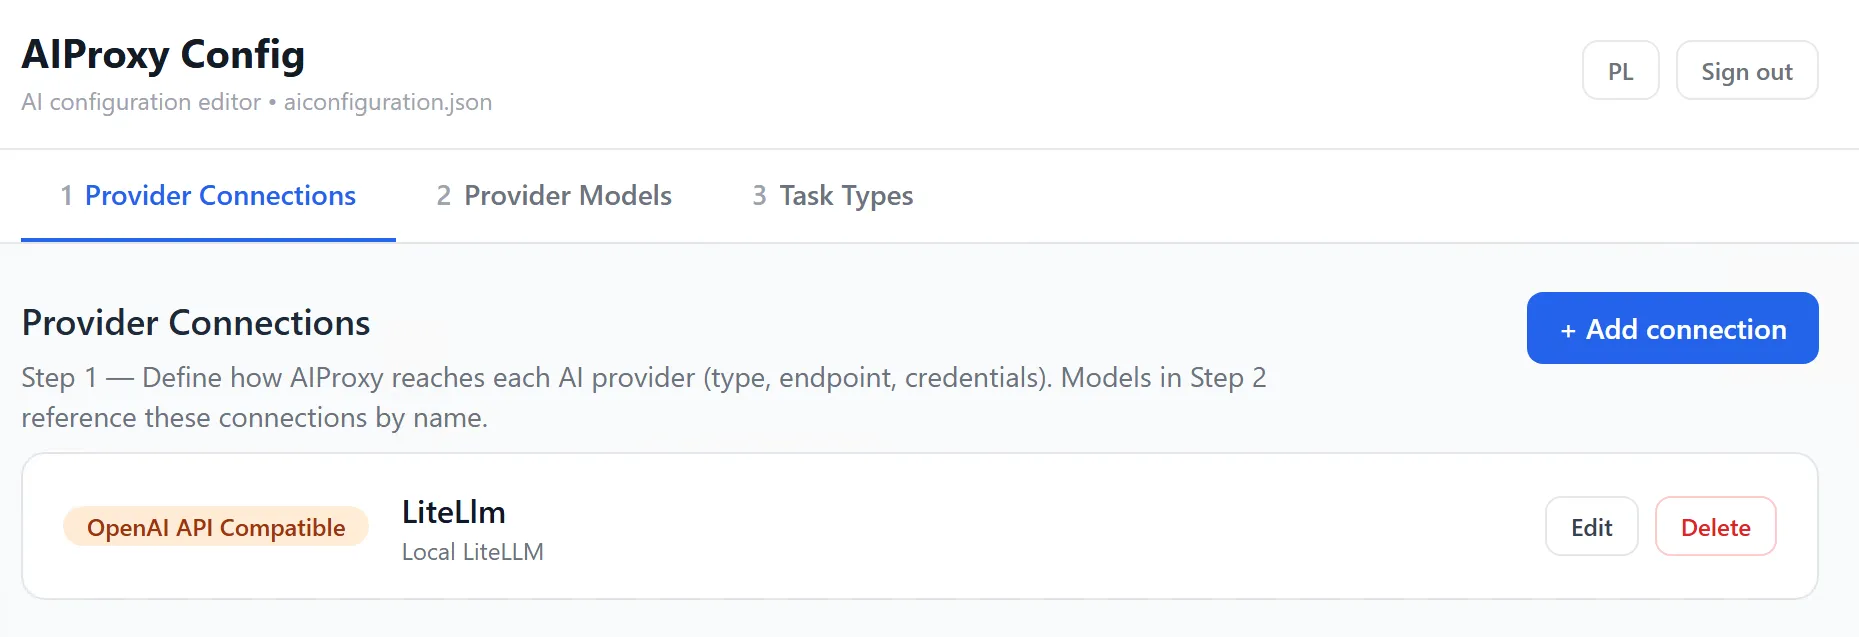
Here you can edit the existing LiteLLM provider connection or add a new provider.
The LiteLLM configuration looks like:
1
Type:
2
OpenAiApiCompatible
3
4
Endpoint:
5
http://litellm:4000
6
7
API key:
8
<LiteLLM master or virtual key>
The endpoint deliberately uses litellm instead of localhost, the Ubuntu hostname or an IP address.
Inside the Docker network, litellm resolves directly to the LiteLLM container.
WEBCON documents OpenAiApiCompatible as the provider type for LiteLLM, with the API key sent using the standard Authorization: Bearer <your-litellm-master-key> in the header.
Provider Models
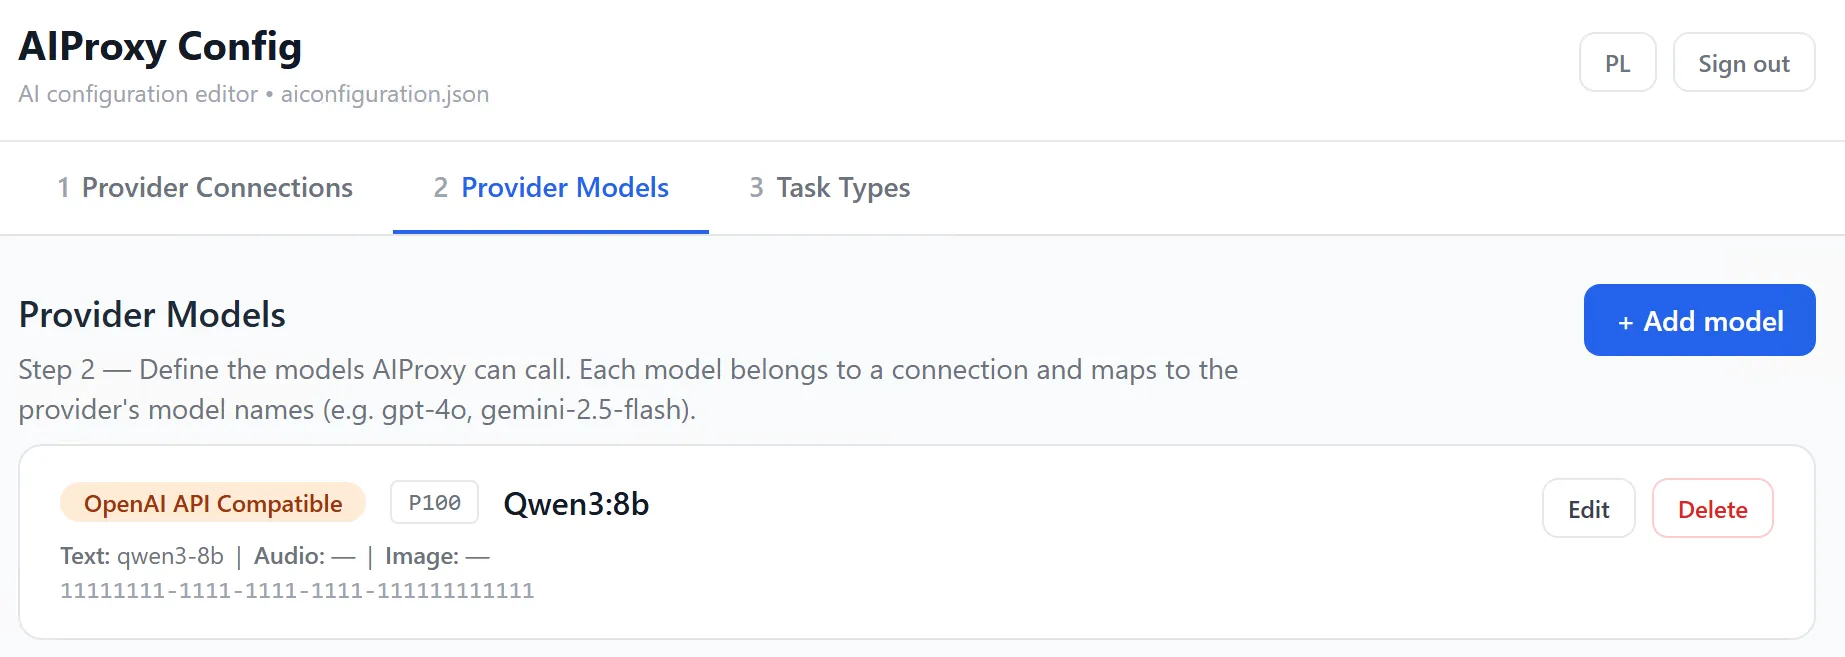
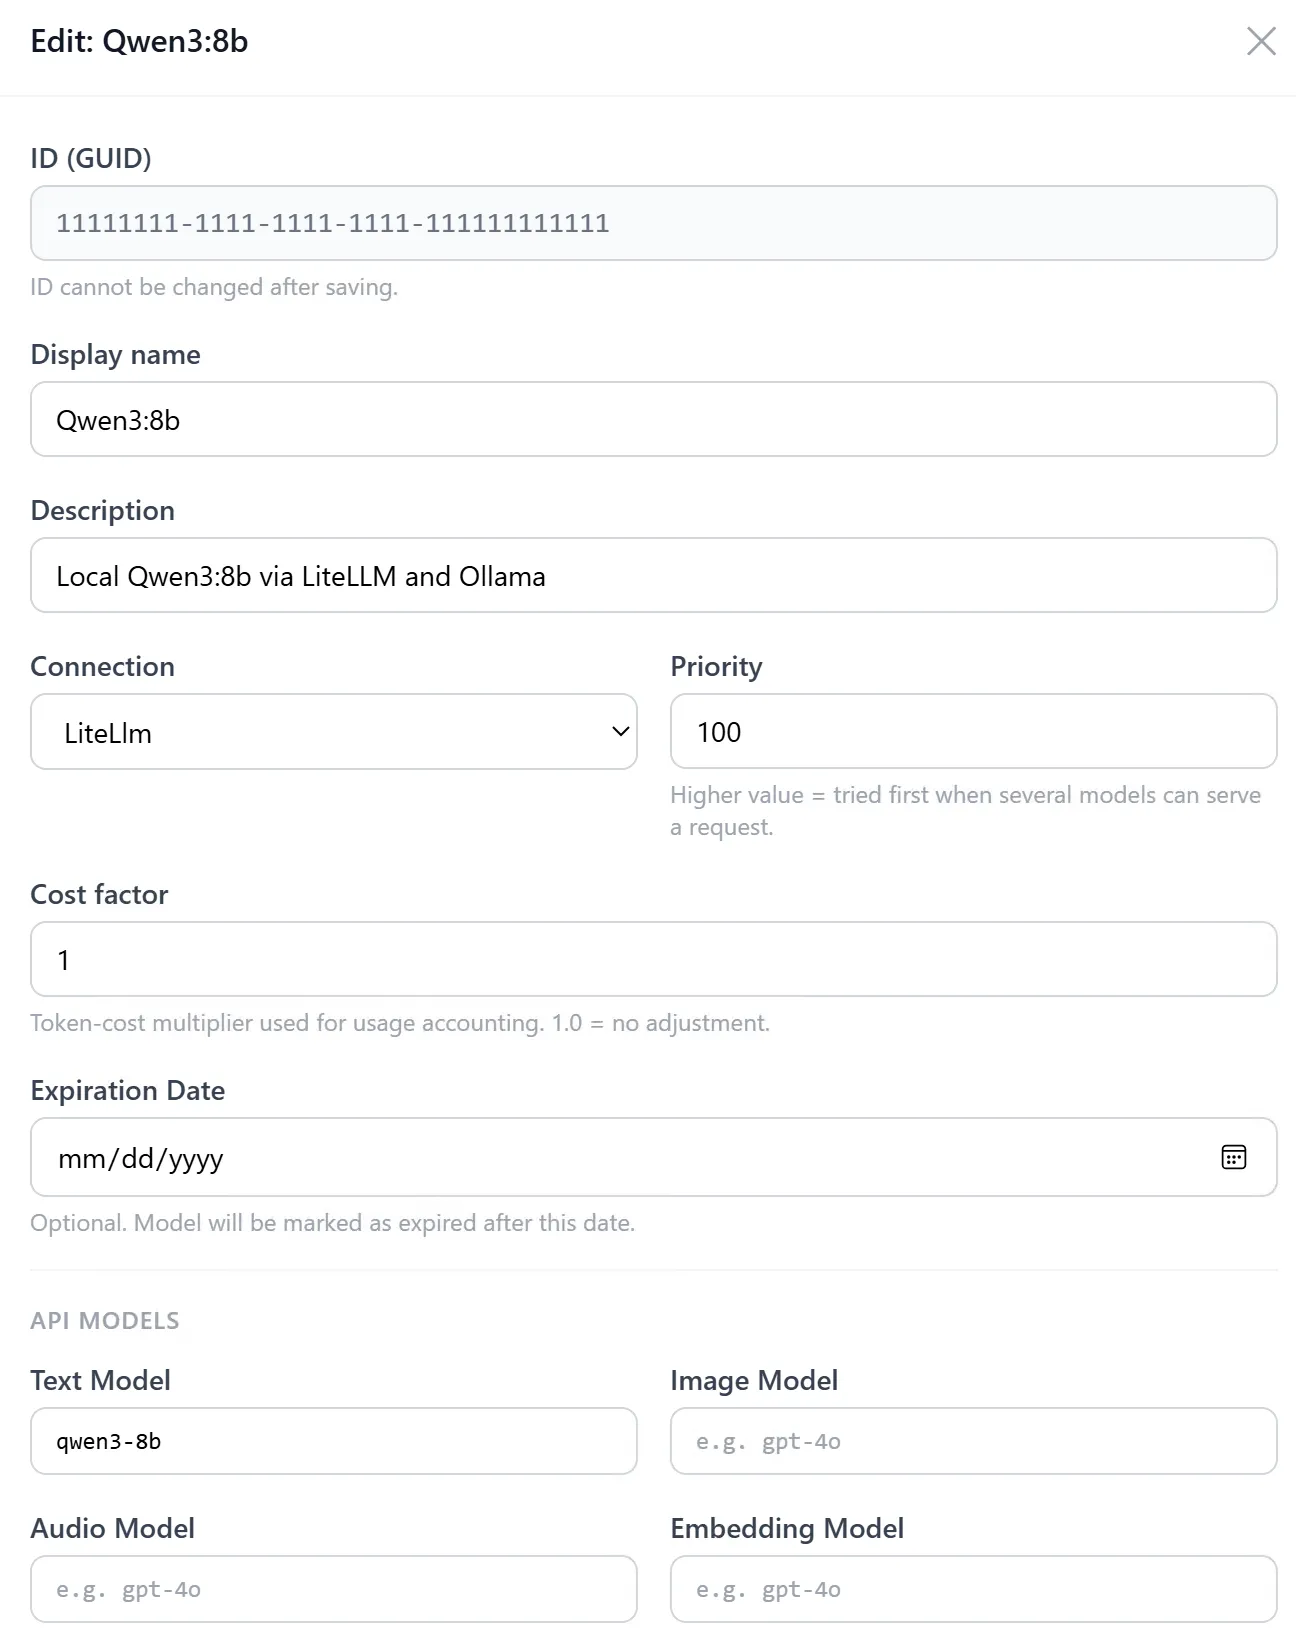
In this tab you can define the models that can be called by the AI Proxy. Each model belongs to a Provider Connection and maps to the provider’s model names (e.g. qwen3-8b in this guide).
Qwen3:8b Provider Model Configuration
The model name is using the LiteLLM alias:
1
qwen3-8b
The complete chain is therefore:
1
WEBCON AI Proxy
2
│
3
│ ModelName: qwen3-8b
4
▼
5
LiteLLM
6
│
7
│ qwen3-8b → ollama/qwen3:8b
8
▼
9
Ollama
10
│
11
▼
12
qwen3:8b
Task Types
For each of the following Task Types you can assign your desired models and their priority order:
Transcribe Audio (transcribeAudio)
AI Agent (aiAgent)
Process Builder (processBuilder)
Concierge (concierge)
Text Sentiment (textSentiment)
Text Summary (textSummary)
Prompt (prompt)
Translation (translation)
Image Generation (imageGeneration)
Embedding Generation (embeddingGeneration)
Concierge Agent (conciergeAgent)
Finalize AI Proxy Configuration
Review the configuration in all tabs of the Config Admin UI and save the changes.
Verify that the file was updated in your Ubuntu ssh session:
Copy the complete block, including both the BEGIN CERTIFICATE and END CERTIFICATE lines.
Do not copy anything containing (if it exists):
1
BEGIN PRIVATE KEY
On the WEBCON Application Server(s), create the file:
1
ai-proxy-public-certificate-for-certlm.cer
and paste the copied certificate into the file.
Trust the self-signed certificate on the WEBCON Application Server(s)
The public certificate copied from the Ubuntu AI Proxy host must also be trusted by the Windows server(s) running WEBCON.
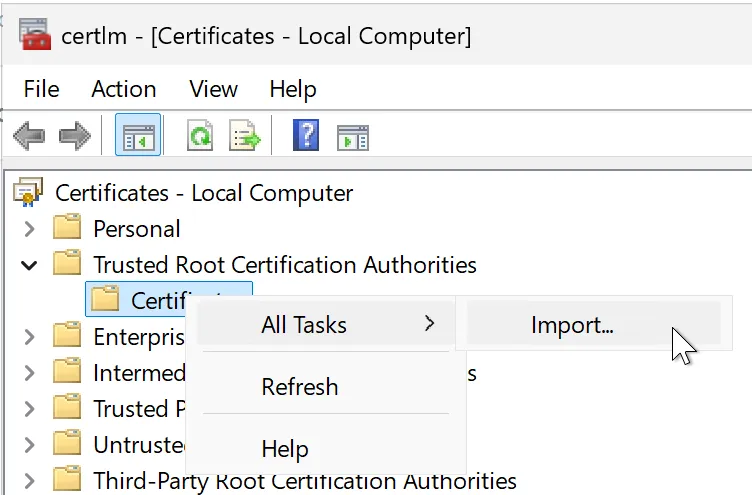
The file ai-proxy-public-certificate-for-certlm.cer contains only the public certificate. This certificate can conveniently be imported through the Windows certificate management console.
Open:
1
certlm.msc
and navigate to in the left pane:
1
Trusted Root Certification Authorities
2
└── Certificates
Right click on Certificates and choose All Tasks > Import.
In the Certificate Import Wizard, follow these steps:
Keep “Local Machine” as Store Location and click on Next.
Click on Browse and select the file - ai-proxy-public-certificate-for-certlm.cer and click on Next.
Keep the Certificate Store Trusted Root Certification Authorities and click on Next.
Review your settings and click on Finish to complete the certificate import.
After the import, verify that the certificate appears in the store and that its Subject Alternative Name (SAN) contains the DNS name used for the AI Proxy connection.
The Windows certificate trust can now be tested with PowerShell ISE. This test only verifies that Windows trusts the TLS certificate presented by the AI Proxy; it does not yet test the mTLS authentication or AI Proxy functionality:
The connection may still fail at this stage because no client certificate is provided for mTLS authentication. The important part of this test is that PowerShell no longer reports a certificate trust error for the certificate presented by the AI Proxy.
After resolving any remaining certificate trust issues, repeat the HTTPS test:
The request reaches the WEBCON AI Proxy without a TLS trust error.
The certificate can now be used when configuring the self-hosted AI engine in WEBCON.
Prepare the certificate for WEBCON Designer Studio
WEBCON Designer Studio requires the combined PEM file containing both the certificate and its private key when configuring the self-hosted AI Proxy. The certificate was already created as certificate.pem on the Ubuntu host.
Copy the certificate for WEBCON Designer Studio
Display the combined PEM file in your Ubuntu SSH session:
The file must contain both the private key and the certificate:
1
-----BEGIN PRIVATE KEY-----
2
...
3
-----END PRIVATE KEY-----
4
-----BEGIN CERTIFICATE-----
5
...
6
-----END CERTIFICATE-----
Copy the complete content. On the WEBCON Application Server(s), create a file named certificate.pem and paste the complete content into this file.
Configure WEBCON Designer Studio
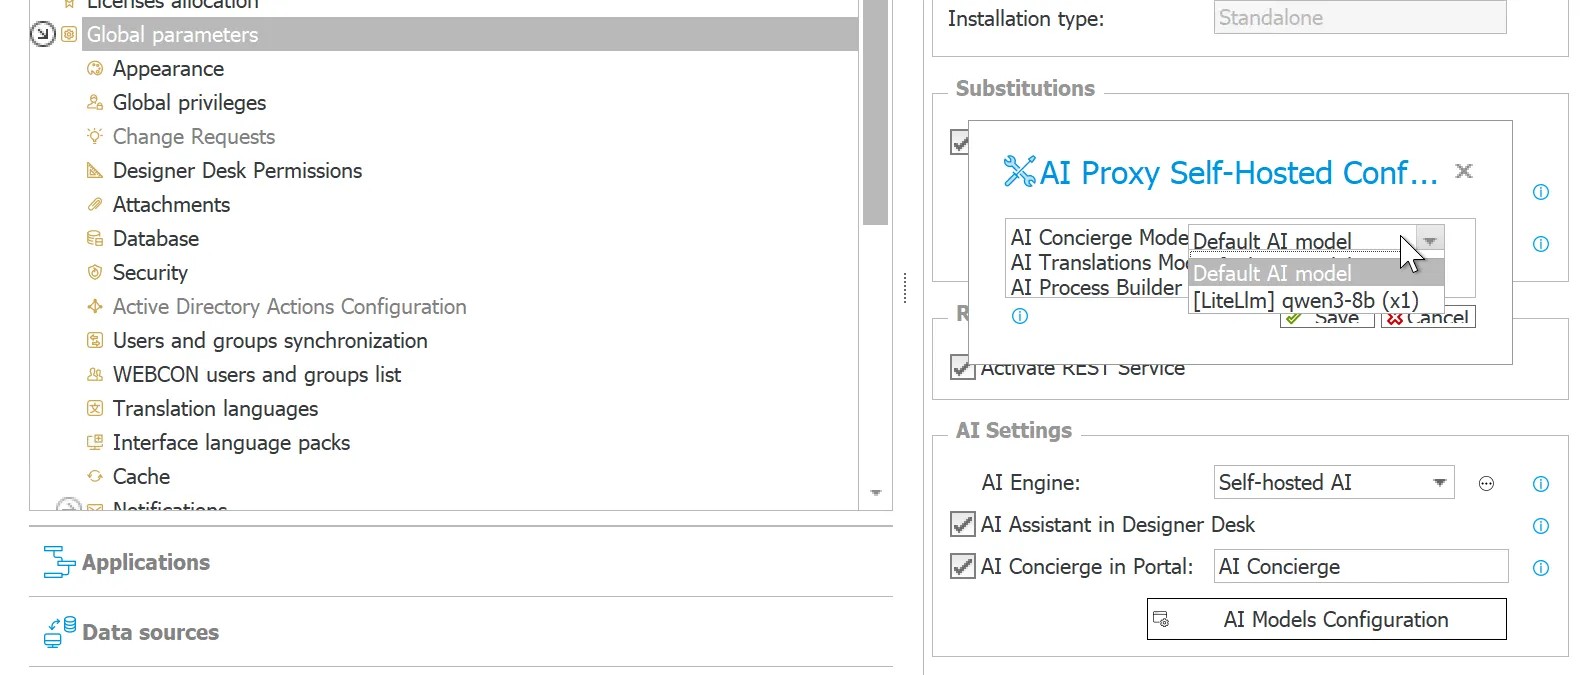
Open WEBCON Designer Studio on your WEBCON application server and navigate to:
System settings
→ Global parameters
→ AI Settings
Select:
1
Self-hosted AI
Using the self-hosted AI Proxy requires the AI Proxy Self-hosted license.
Enter the network address of the AI Proxy, for example, in the shown dialog:
1
https://webcon-ai-proxy-dev.example.local:8081
Provide the combined certificate and private key file:
1
certificate.pem
WEBCON uses the configured certificate and private key for certificate-based authentication when communicating with the self-hosted AI Proxy.
Restart Designer Studio and WEBCON services
After saving changes in the AI Proxy Config Admin UI, restart WEBCON Designer Studio before continuing with the AI configuration. This ensures that Designer Studio starts with the current AI configuration before the AI Settings are configured.
After changing and saving the AI Settings in Designer Studio, reload the WEBCON service configuration on the Application Server so that the new AI configuration is loaded. This stops the active service tasks and restarts them with the updated configuration. Click “Load configuration” under System settings > Services configuration > Services > .
If the configured self-hosted models do not appear in Designer Studio afterwards, close and restart Designer Studio once more.
A useful sequence after configuration changes is therefore:
1
Save AI Proxy Config Admin UI configuration
2
↓
3
Restart Designer Studio
4
↓
5
Configure / save AI Settings
6
↓
7
Reload WEBCON service configuration
8
↓
9
Restart Designer Studio
10
↓
11
Verify the self-hosted models
Verify the self-hosted models
Verify the self-hosted models by calling the following URL in your browser. Replace webcon.example.local with your WEBCON Portal URL and 1 with the ID of the relevant WEBCON database:
Communication flow between WEBCON and the self-hosted AI Proxy
The WEBCON Designer Studio does not communicate directly with the AI Proxy. When an AI model is selected or the model list is refreshed, the request is handled by the WEBCON Application Server.
The communication flow is:
1
WEBCON Designer Studio
2
│
3
│ HTTPS
4
▼
5
WEBCON Application Server
6
│
7
│ HTTPS :8081
8
│ mTLS / client certificate
9
▼
10
WEBCON AI Proxy
11
│
12
│ HTTP :4000
13
▼
14
LiteLLM
15
│
16
│ HTTP :11434
17
▼
18
Ollama
19
│
20
▼
21
Qwen3:8b
When Designer Studio requests the available AI models, the following happens:
Designer Studio contacts the WEBCON Application Server
Designer Studio calls the Studio API of the WEBCON Portal. For example:
1
GET /api/studio/db/<database-id>/getaimodels?method=Concierge
Therefore, Designer Studio itself does not require direct network access to TCP port 8081 of the AI Proxy.
2. The WEBCON Application Server checks AI availability
Before contacting the AI Proxy, WEBCON verifies whether AI functionality is available for the environment, including the corresponding license information.
3. The WEBCON Application Server contacts the AI Proxy
The Application Server uses the AI Proxy endpoint configured under the WEBCON AI settings, for example:
1
https://webcon-ai-proxy-dev.example.local:8081
Consequently, TCP port 8081 must be reachable from the WEBCON Application Server to the AI Proxy host.
4. The AI Proxy certificate is validated
The Windows server must trust the certificate presented by the AI Proxy.
The public certificate is therefore imported into:
1
Local Computer
2
└── Trusted Root Certification Authorities
For a self-signed certificate, the certificate must also contain the AI Proxy FQDN in its Subject Alternative Name (SAN).
5. WEBCON uses the certificate configured in AI Settings
The combined certificate.pem created earlier and configured in WEBCON AI Settings must contain both the private key and the public certificate:
1
-----BEGIN PRIVATE KEY-----
2
...
3
-----END PRIVATE KEY-----
4
-----BEGIN CERTIFICATE-----
5
...
6
-----END CERTIFICATE-----
This is important: providing only the public certificate is not sufficient.
If the private key is missing, requesting the model list fails on the WEBCON Application Server with HTTP 500, while the AI Proxy itself may not show any corresponding request.
The underlying error is:
1
No RSA private key found in PEM.
AI Proxy forwards AI requests to LiteLLM
After authentication and validation, the AI Proxy uses the provider configuration from aiconfiguration.json and forwards the request to LiteLLM:
1
http://litellm:4000
Within the Docker bridge network, the service name litellm resolves directly to the LiteLLM container.
7. LiteLLM maps the WEBCON model to Ollama
LiteLLM receives the configured model name:
1
qwen3-8b
and maps it through config.yaml to the corresponding Ollama model.
8. LiteLLM contacts Ollama
LiteLLM sends the inference request to Ollama:
1
http://ollama:11434
Ollama then executes the locally installed:
1
qwen3:8b
The response travels back through the same chain
1
Qwen3:8b
2
↓
3
Ollama
4
↓
5
LiteLLM
6
↓
7
WEBCON AI Proxy
8
↓
9
WEBCON Application Server
10
↓
11
Designer Studio / Portal
Network requirements
With the Docker bridge network used in this setup, the relevant communication paths are therefore:
Source
Destination
Port
Protocol
Designer Studio
WEBCON Application Server
443
HTTPS
WEBCON Application Server
AI Proxy
8081
HTTPS
AI Proxy
LiteLLM
4000
HTTP
LiteLLM
Ollama
11434
HTTP
Only TCP 8081 needs to cross from the WEBCON infrastructure to the Ubuntu AI host. Ports 4000 and 11434 remain internal to the Docker bridge network and are not exposed on the Ubuntu host.
Important: The WEBCON Designer Studio does not directly connect to the AI Proxy. The WEBCON Application Server acts as the communication endpoint towards the AI Proxy. Therefore, certificate trust, DNS resolution and firewall connectivity to the AI Proxy must be verified from the WEBCON Application Server.
End-to-end verification
At this point the complete request path is:
1
WEBCON
2
│
3
│ HTTPS :8081
4
▼
5
WEBCON AI Proxy
6
│
7
│ http://litellm:4000
8
▼
9
LiteLLM
10
│
11
│ http://ollama:11434
12
▼
13
Ollama
14
│
15
▼
16
Qwen3:8b
A successful AI request from WEBCON confirms that the complete request path through the AI Proxy, LiteLLM, Ollama and the local model is working.
A simple way to perform an end-to-end test is through the AI Models Configuration in WEBCON Designer Studio. Navigate to System settings > Global parameters > AI Settings, open AI Models Configuration and check if you can find the configured self-hosted model for one of the available AI features.
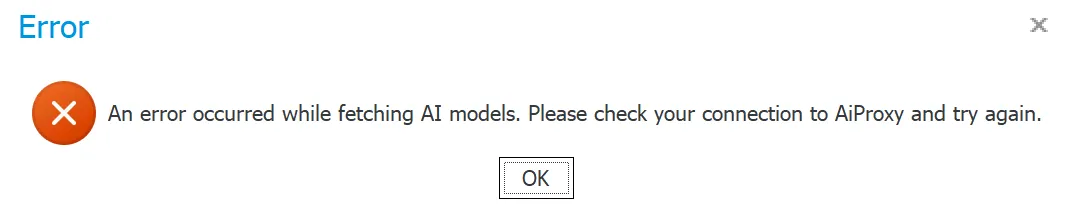
If WEBCON cannot retrieve the configured AI models, the error:
An error occurred while fetching AI models. Please check your connection to AiProxy and try again.
may appear:
This usually indicates that the WEBCON Application Server cannot establish the required connection to the AI Proxy. Check DNS resolution, network and firewall connectivity to TCP port 8081, certificate trust, and the certificate configured in the WEBCON AI Settings, which must contain both the private key and the public certificate.
If the AI models are retrieved successfully and no connection error appears, select the configured self-hosted model and execute an AI test request. While the request is running, monitor the container logs on the Ubuntu host:
1
cd/opt/webcon-ai-stack
2
sudodockercomposelogs-f\
3
webcon-ai-proxy\
4
litellm\
5
ollama
Expected result:
The logs should show activity in the AI Proxy, LiteLLM and Ollama while the AI request is processed. If the request completes successfully, the generated response is returned through the same chain to WEBCON.
Stop the log output with Ctrl+C. This only stops log monitoring. It does not stop the containers.
Final Result
The final setup provides a local LLM to WEBCON while keeping Ollama and LiteLLM isolated within the Docker bridge network and exposing only the WEBCON AI Proxy to the corporate network:
1
Corporate network
2
3
WEBCON Application Server
4
│
5
│ HTTPS :8081
6
▼
7
┌─────────────────────────────────────────────┐
8
│ Ubuntu VM │
9
│ │
10
│ WEBCON AI Proxy │
11
│ webconbps/aiproxy:2026.2.135.35 │
12
│ │ │
13
│ │ OpenAI-compatible API │
14
│ ▼ │
15
│ LiteLLM :4000 │
16
│ Model alias: qwen3-8b │
17
│ │ │
18
│ │ Ollama API │
19
│ ▼ │
20
│ Ollama :11434 │
21
│ Model: qwen3:8b │
22
│ │
23
│ Docker bridge: webcon-ai │
24
│ Example: 172.30.0.0/24 │
25
└─────────────────────────────────────────────┘
26
27
Only HTTPS :8081 exposed
This architecture keeps the interfaces between the individual components simple:
WEBCON only communicates with WEBCON AI Proxy.
AI Proxy sees LiteLLM as an OpenAI-compatible provider.
LiteLLM abstracts the locally hosted model.
Ollama is responsible for running Qwen3:8b.
Docker provides isolation and internal DNS-based service discovery.
Only the WEBCON AI Proxy is exposed outside the Docker bridge network through HTTPS port 8081.
The result is a self-hosted AI architecture in which the complete LLM inference path remains within the local infrastructure.
Comments
Comments will be added here later.